Creating a new action
To create a new action, go to the content browser, click on “Add new”, expand the Expressive Text category and pick the “Expressive Text Action” option.
Make sure to name it in a way that reflect the tasks it’s going to perform.
You can now open the action and get your hands dirty!
Declaring action parameters
Often, it’s useful to parameterize the action so it’s more versatile and avoid having dozens of very similar actions.
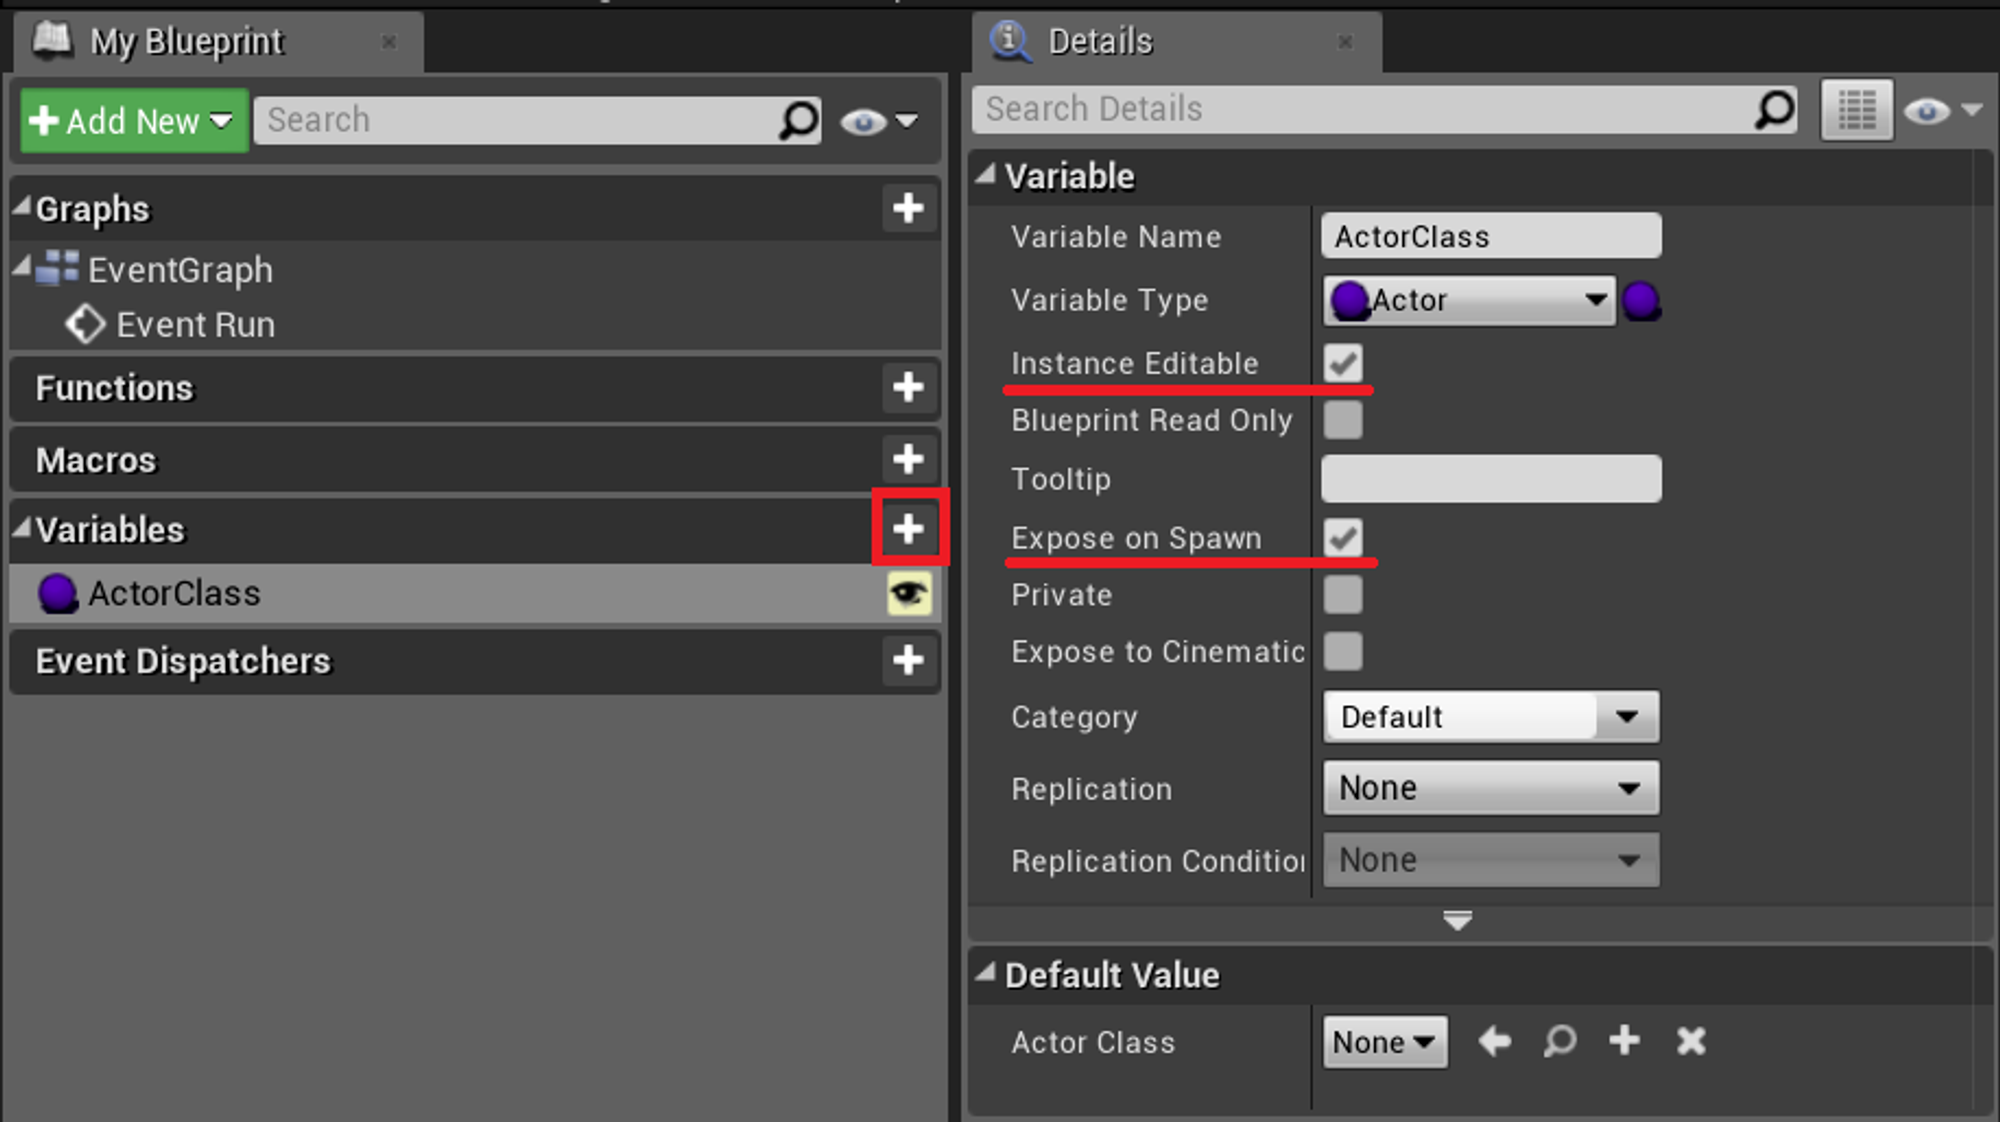
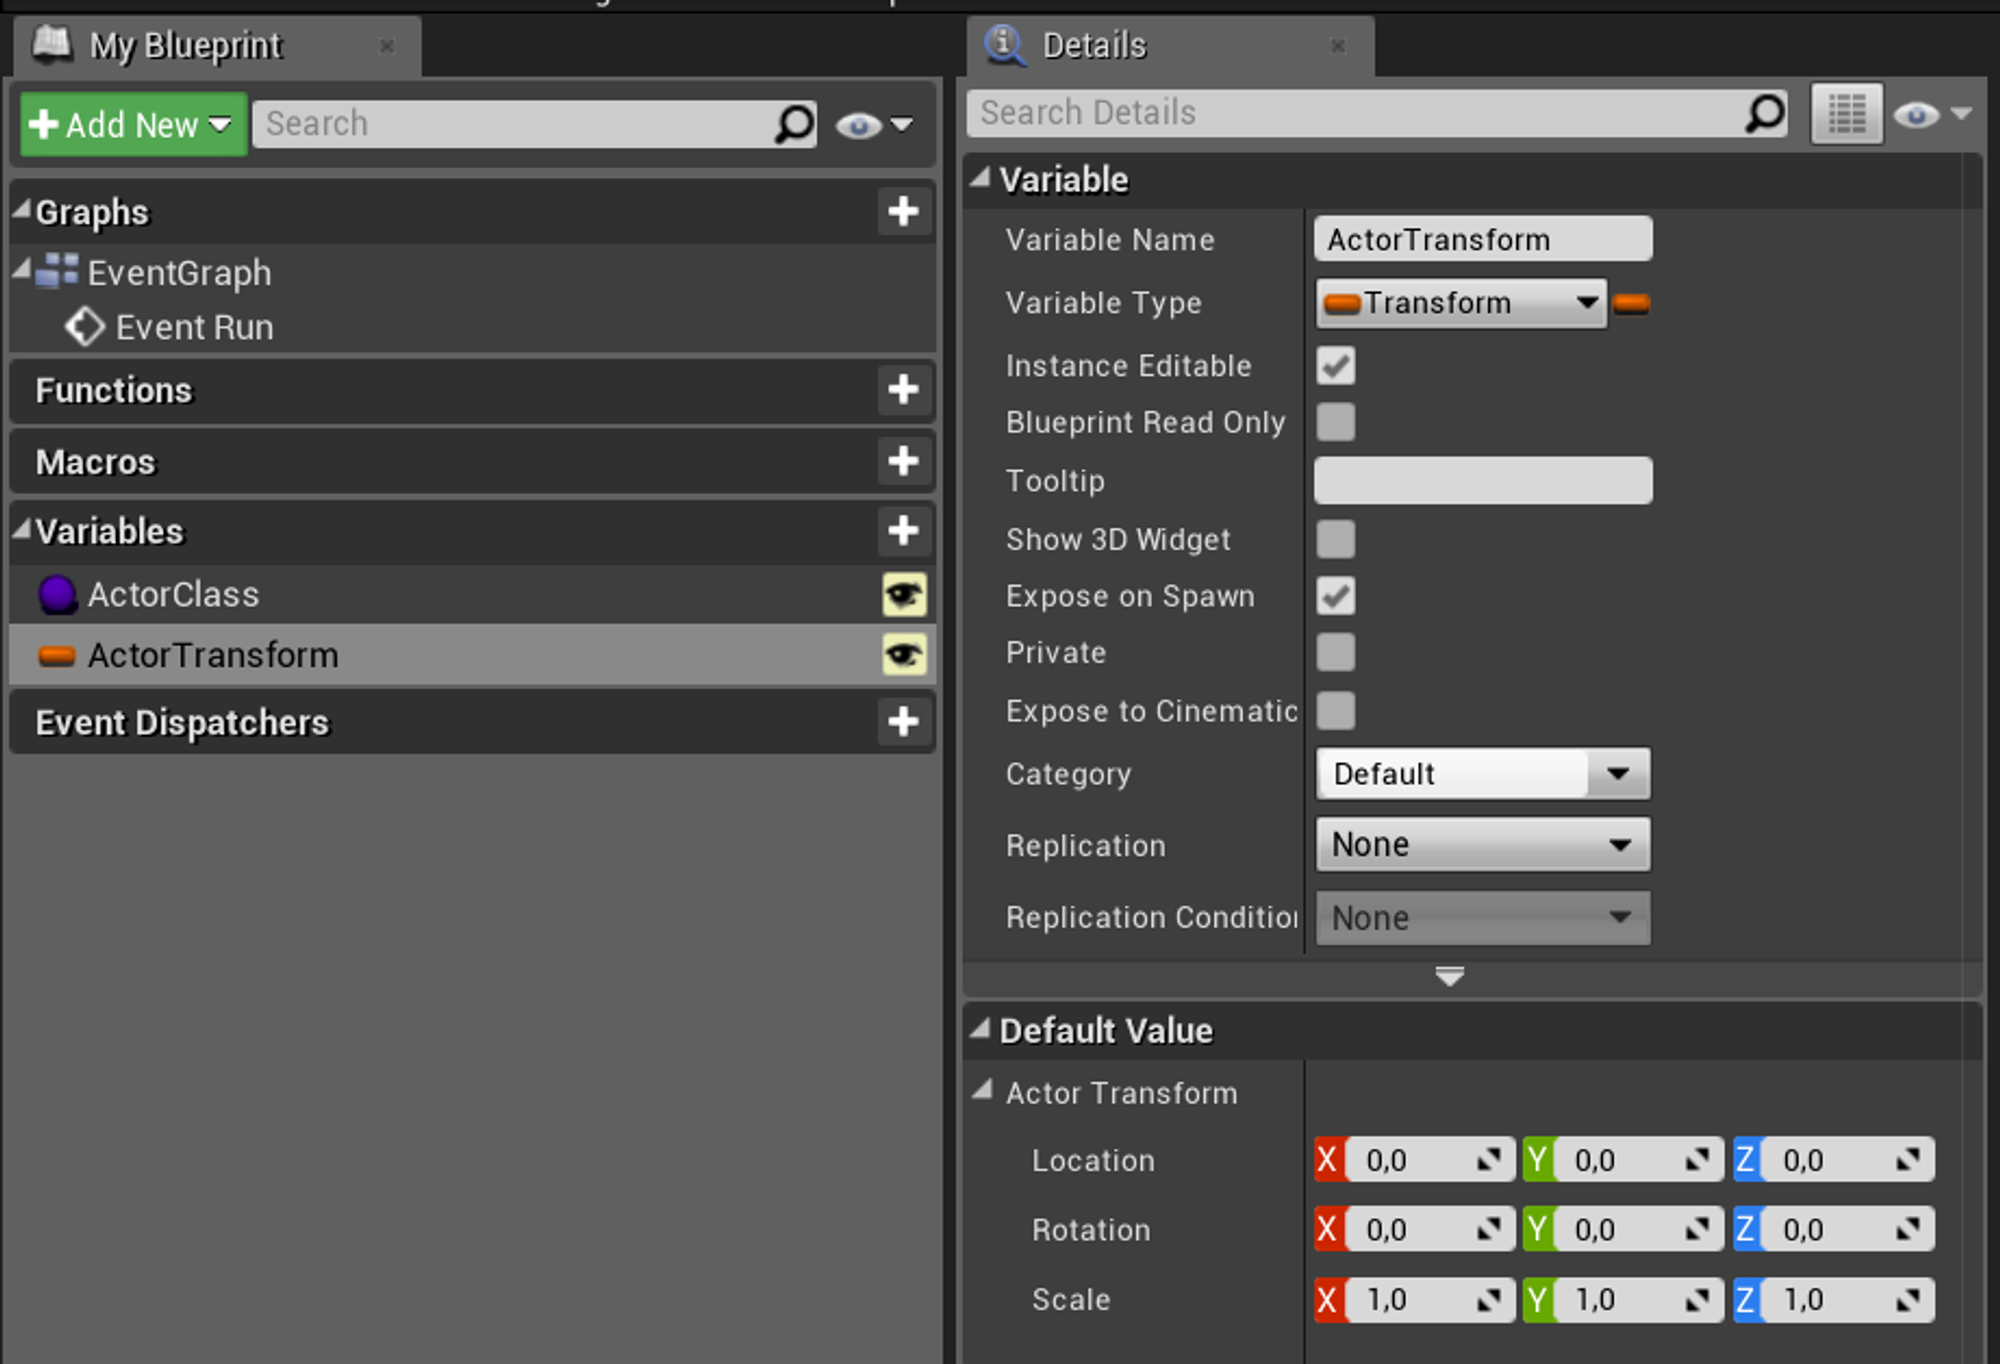
It’s very simple to add parameters, just add a new variable of your preferred type to your action and make sure to tick “Instance Editable” and “ExposeOnSpawn”
For our SpawnActor example we’re adding an ActorClass and ActorTransform:
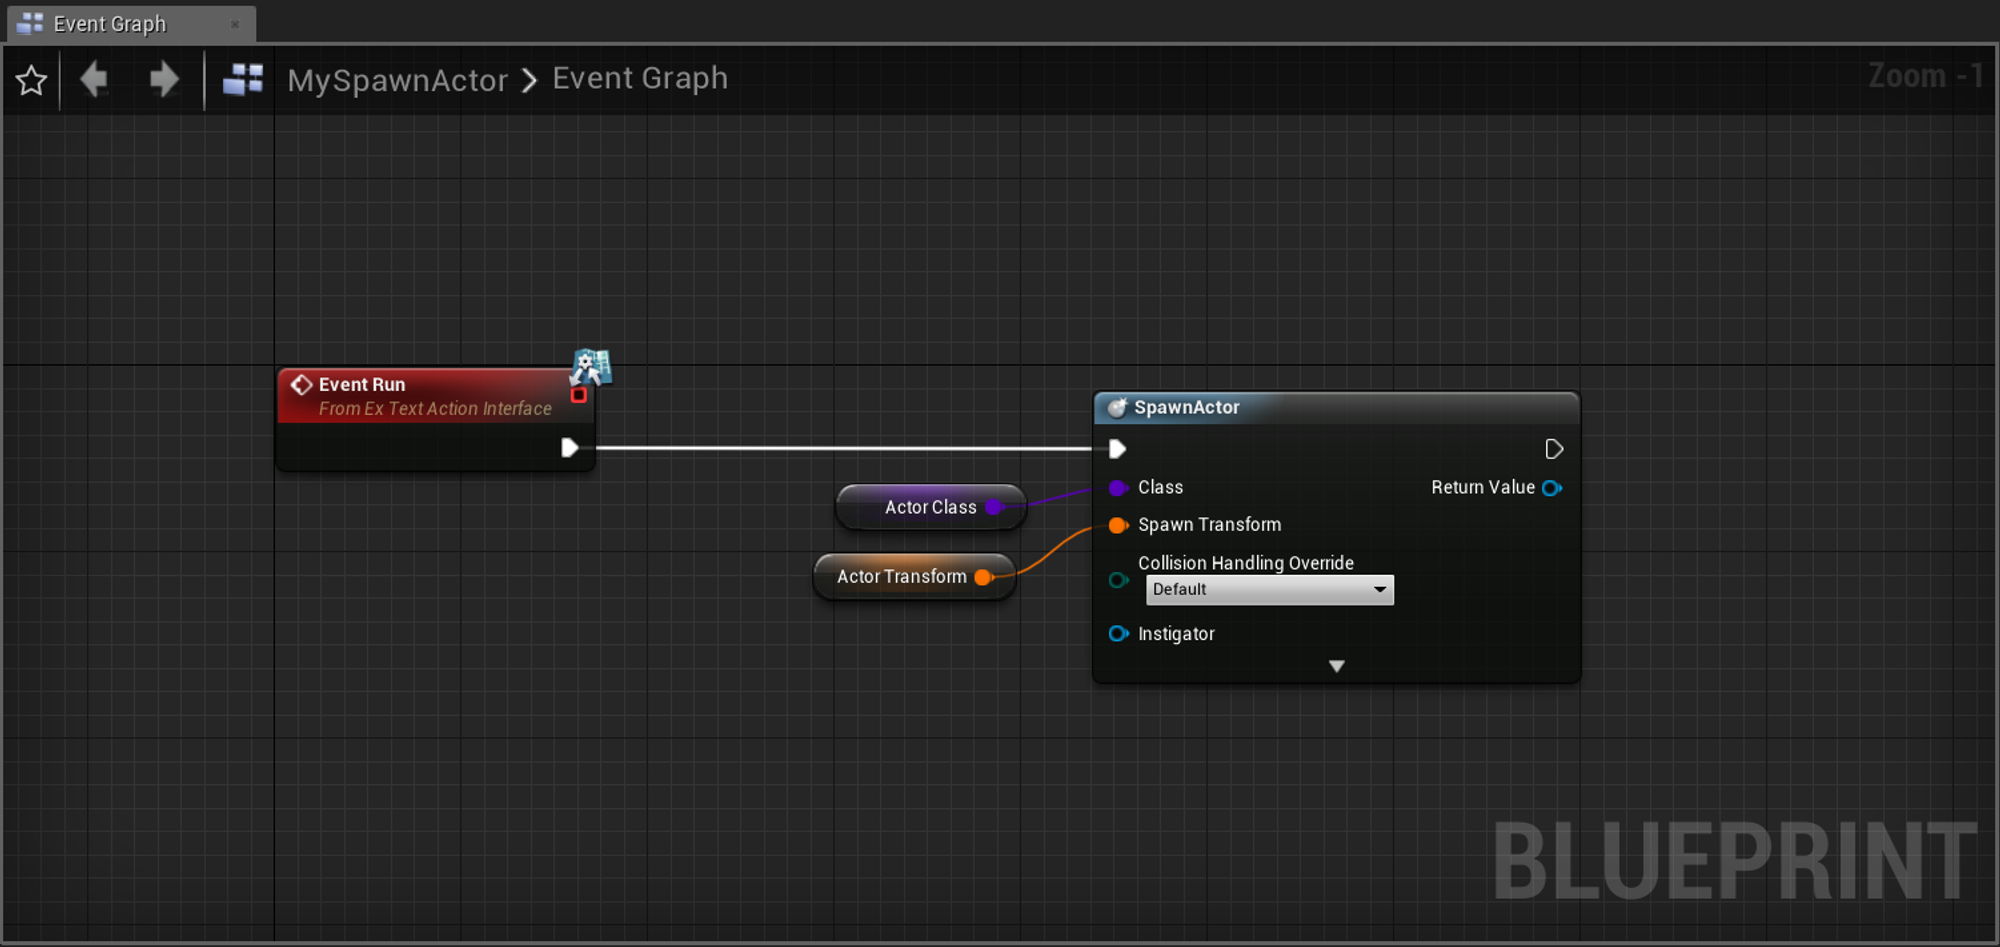
Defining the logic
You can use the Run event to execute custom blueprint logic — in this case we’re just spawning an actor using the parameters we’ve created in the previous step
Make sure to compile and save your action
Triggering an action from text
For this example we’re creating a new Expressive Text Asset, but you can use yours or use the inline text option.
First make sure to add your action instances in the actions panel at the bottom - there you’ll be able to give it a name (important since it’s the name you’ll be using to trigger it) and set the values to your parameters.
Write the action interjection where you want it to be triggered (either
<action:ACTION NAME> or the shortened <a:ACTION NAME>)Please be aware of the
ShouldRenderWhenOffscreen flag available on ExpressiveTextActor — it will pause text from being revealed when it is offscreen, meaning actions will also be paused.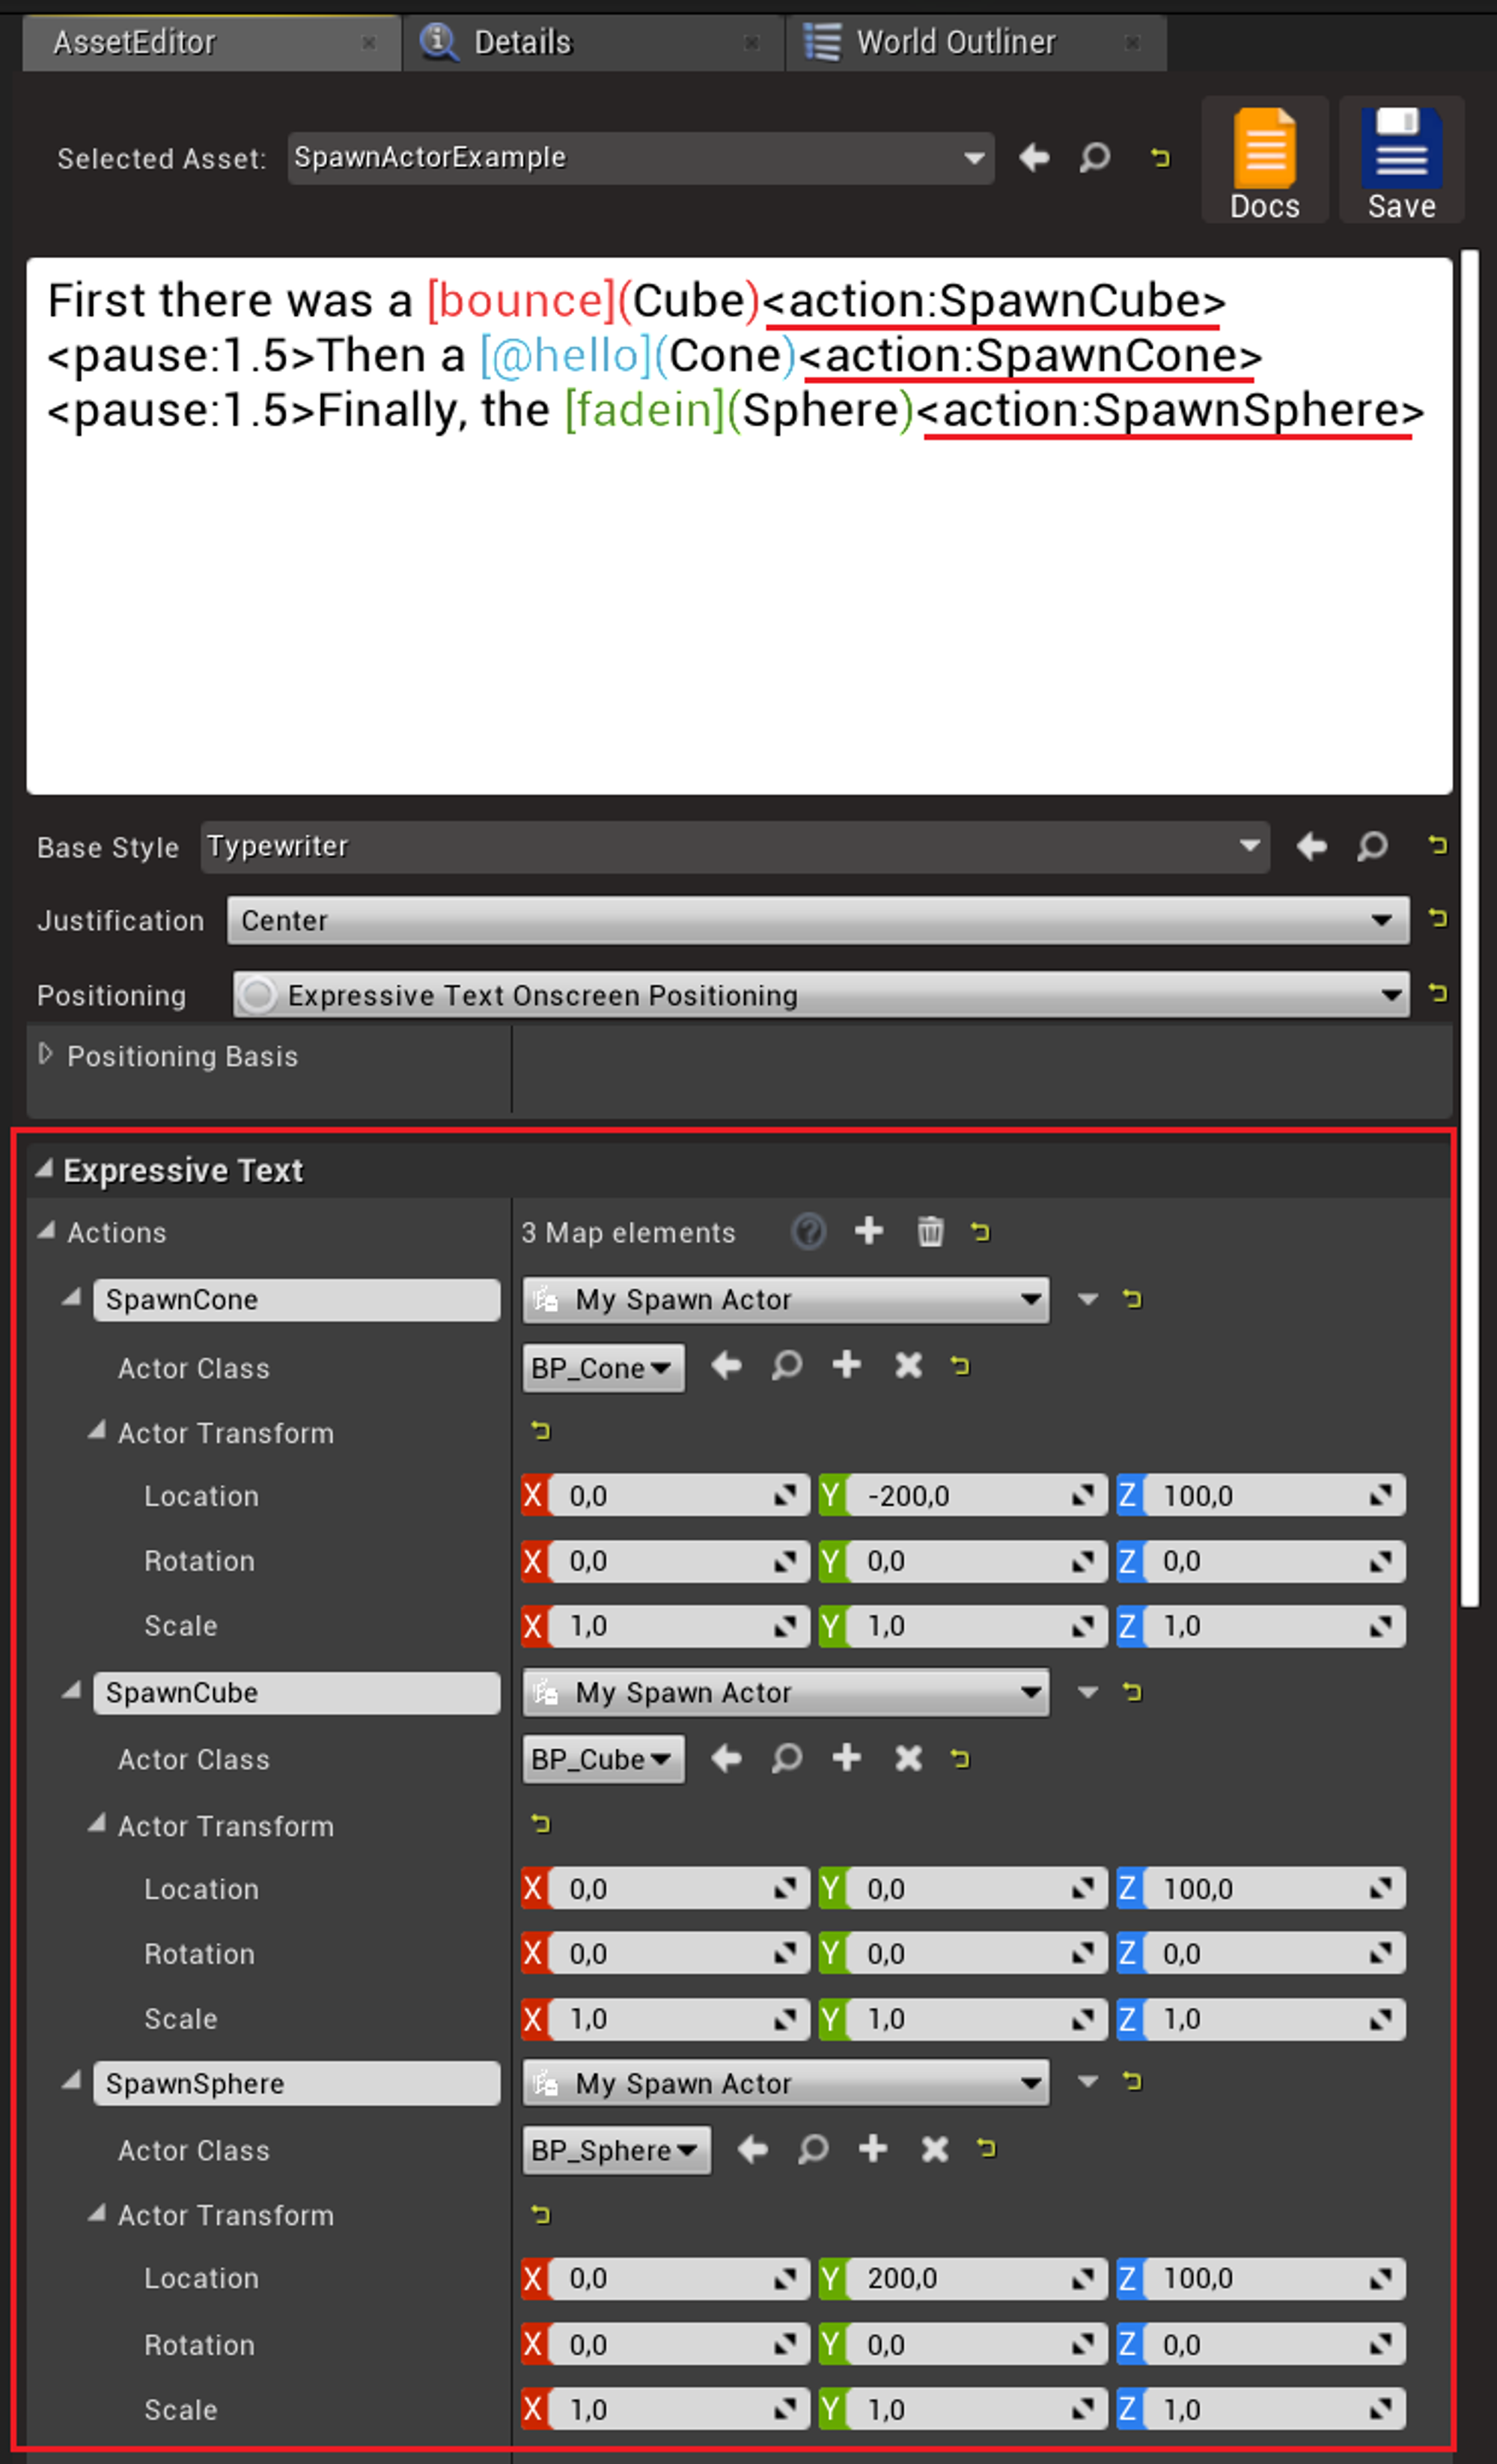
Here’s the result: